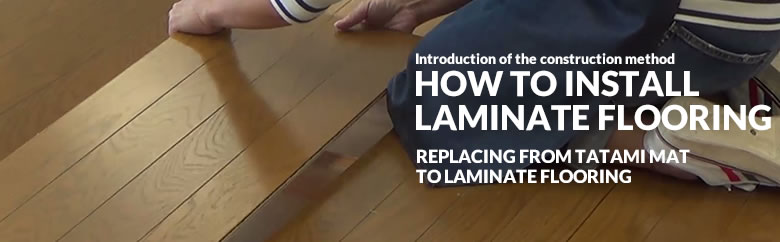
How to install laminate flooring
Replacing from tatami mat to laminate flooring
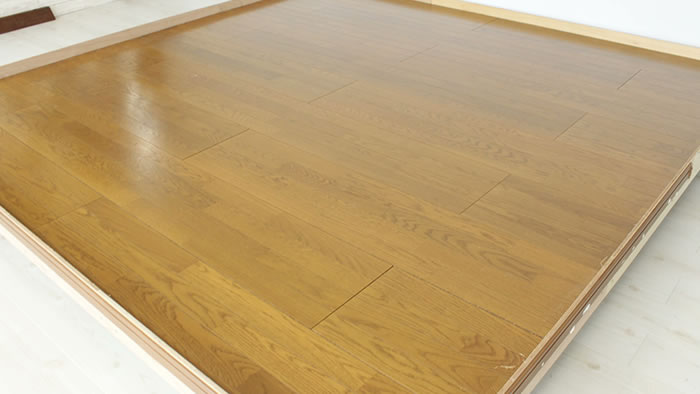
We are introducing a procedure to lay laminate flooring boards onto joists.
VIDEO
PHOTOS
PREPARATION
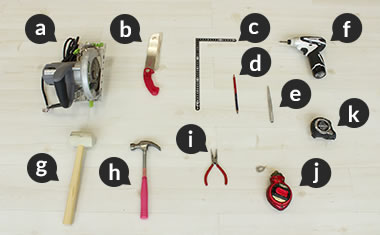
- a. Circular saw b. Handsaw c. Square ruler
d. Pencil e. Nail punch f. Electric drill
g. Rubber mallet h. Hammer i. Pliers
j. Chalk reel k. Measurement tape
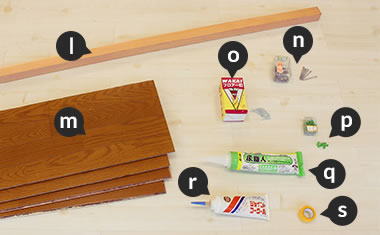
- l. Joist material m. Flooring material n. Screws
o. Wood flooring nails p. Nails for temporary use
q. Joist adhesive r. Caulk s. Masking tape
BEFORE STARTING
Choose the right flooring material.

Make sure you choose the right flooring material to lay directly onto the joists.
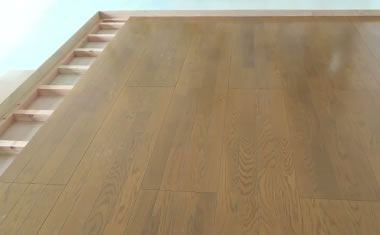
STEP1: Lay joists.
Make sure it has space.
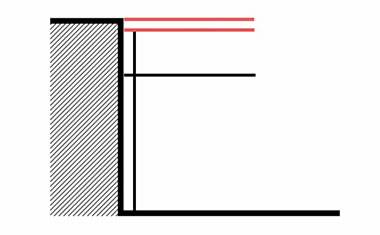
Make sure there is an extra 2-3mm space between the top of the flooring and the top of the threshold.
Lay joists.
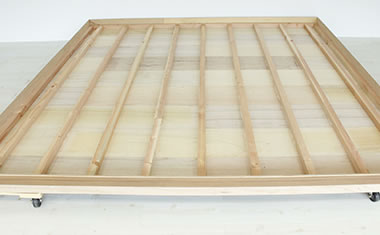
You lay joists along the walls and in the center of the floor. Lay the remaining joists leaving 30cm between each joist.
Hammer in the screws.
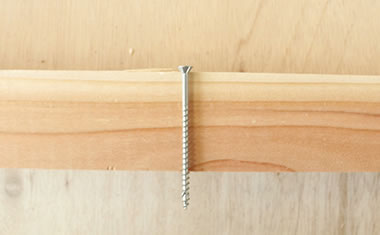
Make sure to use the screws that are longer than the thickness of the joists. Hammer the screws into the flooring through joists.
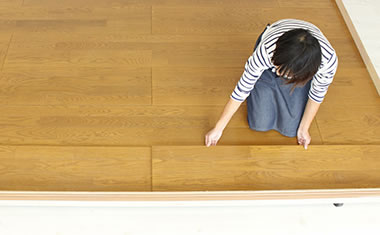
STEP2: Lay flooring boards temporarily.
Draw a center line.
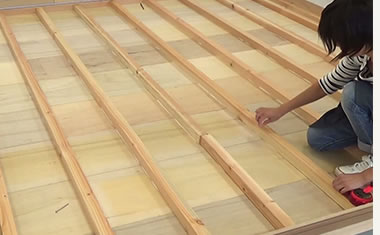
Measure out the center line in the room and draw a line on a joist using a chalk reel.
Set the position for boards.
For the odd numbered rows, make sure the seam between two flooring boards is right on the center line. For the even numbered rows, make sure the center of a board comes right on the center line.
Place the ends of boards on the joists.
Either way, you need to make sure to place both ends of each board on the joists.
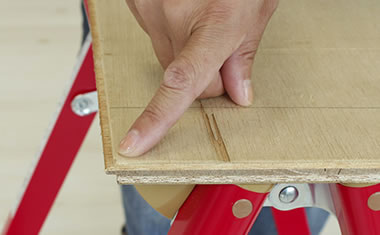
Cut the boards.
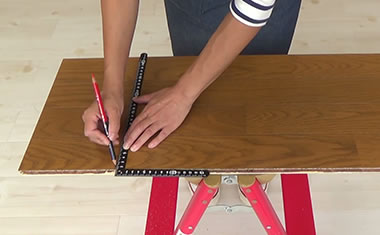
When you cut the boards, first measure it from the end of the board excluding the tongue and draw a line on the board using measuring tape and a square ruler. Cut along the lines.
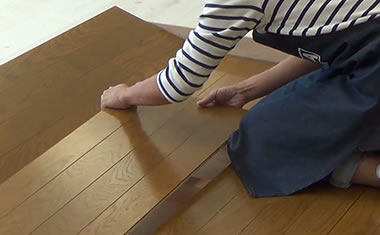
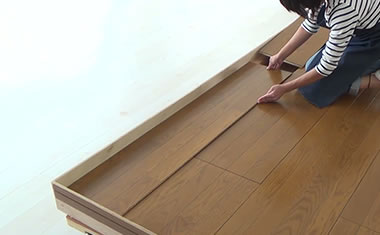
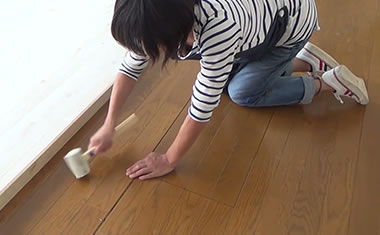
Click in the boards.
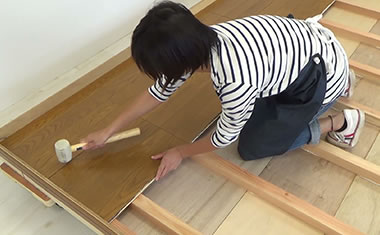
Click the boards into the one beside it firmly using a rubber mallet.
Repeat.
Repeat the same process for the rest of the boards. Check the length of the boards for the last row and leave them there without clicking them in.
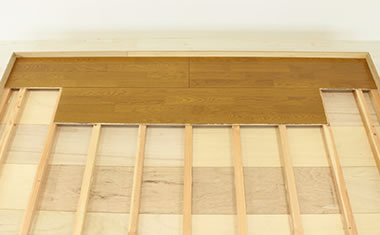
STEP3: Cut the board of the last row.
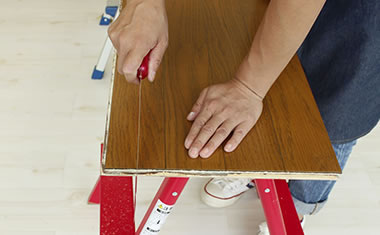
Cut a piece of board.
Find a piece of board you didn’t use and cut off the tongue on one side. This will work as a ruler for the next process.
Replace boards.
Replace the boards for the last row with the boards that have already been laid on the second last row using a rubber mallet.
Rip the board.
Slide the cut piece of board along the wall and draw a straight line on the boards for the last row. Rip the board along the line.
Check the width of the boards.
Take out the boards for the last row and put back the boards for the second last row. Place the boards for the last row in the gap and check the width is correct.
Take out all the boards.
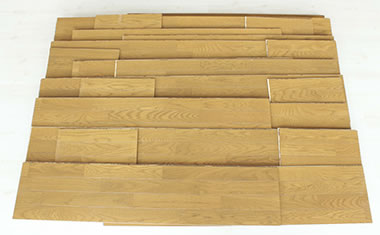
Take out all the boards. Make sure you lay them in order.
For large rooms.
If it's a large room and the floor already has a center line, you can skip the process and lay the flooring boards straight away onto the joists using adhesive.
STEP4: Lay the flooring boards.
Apply adhesive on the joists.
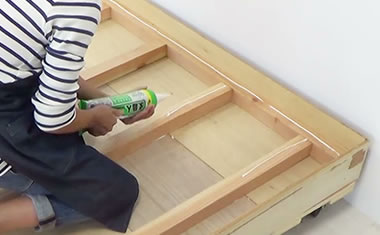
Apply adhesive on the joists. Make sure you apply it only on the area of the boards you are going to apply over.
Lay the boards.
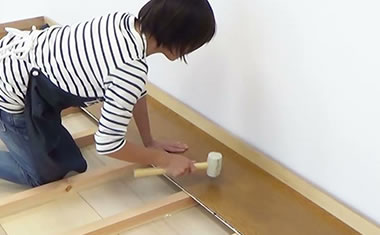
Lay the boards and push them onto the joists using a rubber mallet.
Hammer in flooring nails.
First, hammer in flooring nails at a 45 degree angle above the tongue and hammer in firmly using a nail punch afterward.
Repeat.
Repeat the same process for the rest of the boards clicking the tongue into the side of the boards next to them.
STEP5: Fit the boards for the last row in the gap.
Apply adhesive.
Apply adhesive on the joists. Insert the tongue into the side of the boards next to them and push them in slowly using a rubber mallet.
Hammer in nails for temporary use.
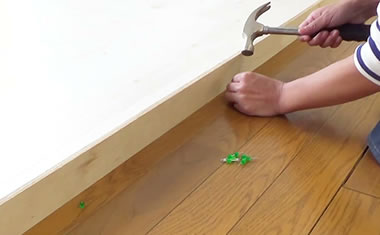
Hammer in nails for temporary use where the joists are underneath and wait until the adhesive dries.
Take out the nails.
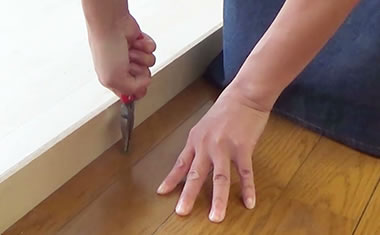
When the adhesive dries, take out the nails.
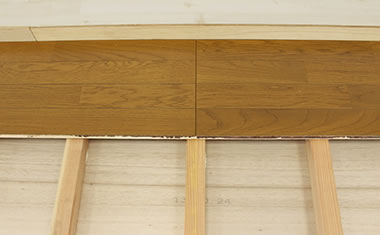
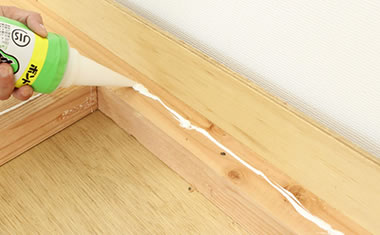
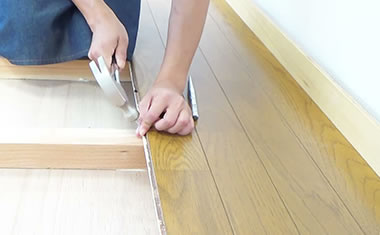
STEP6: Fill in the gap along the walls using caulk.
Tape the area.
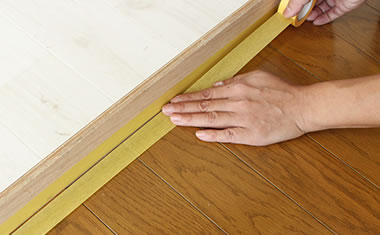
Tape the area around the gap.
Pour caulk in.
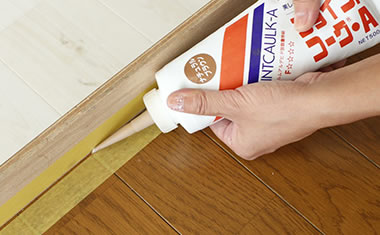
Pour caulk in the gap and smooth the surface using your finger. Peel off the tape before the caulk dries. You can apply skirting boards to hide the gap.
finished